
Published in:
![]()
A Bike For the Road
by John
Robson
Generally accepted wisdom has it that running is the best sport, really the only sport, for frequent flyers and business travelers. All you need is a pair of shoes, singlet, shorts and, maybe, sweats and you're in business. No matter where you wake up in the morning, it's a simple matter to lace up the shoes, head out the door and get your workout in before attending to business.
Not only do you keep your fitness level up, but you tend to learn more about each new city or village, getting a street level perspective that most business travelers never make time to enjoy.
Conversely, the same wisdom holds that cycling is just about the worst sport in the world for the guy or gal on the go. Just when you start to find your form on the bike, you're back on the silver bird on another foray into the hinterlands, your shiny steed forlornly garaged awaiting your return. And you know the formula: for every week off the bike, it takes three weeks to get back to where you were. So you just can't have it both ways, travel a lot and still maintain competitive shape on the bike. Or can you?
As someone who has long been entrenched in the upper stratospheres of American Airlines' Advantage program, I had long been interested in putting cycling on a level with running. I wanted a portable bike, one that would be there for me wherever I was. The first obstacle in traveling with your bike is just the ungainly nature of the beast itself. Let's face it. When you're traveling for business, you're already in major schlep mode ... garment bag, suitcase, briefcase, laptop. You're a virtual Sherpa as you negotiate rental car counters, taxis, subways, etc. Adding a soft-sided bike bag just makes it ludicrous.
Then, you've got the airlines themselves, which are downright hostile when it comes to transporting your toys. After they charge you obscene amounts of money for the service of flying your bike, they make you sign a waiver releasing them from liability should they damage it. Nice touch.
All the pitfalls aside, the notion of having a bike around at all times is intoxicating. If running frees you to discover little nooks in your destinations, then a bike would vastly increase the range of your discoveries. For Floridians whose typical riding conditions could be summed up as "hot and flat," a truly transportable bike could be the window to frequent forays into cooler climes and daunting climbs. And there's the matter of maintaining that elusive fitness.
For years I considered oddities like Slingshot or Bike Friday, little folding bikes with super small wheels that promised big bike performance. I would have tried one out, too, but for the fact that the companies that make them are so small they could never even free up a sample for a magazine test.
A Break in the Case
Then Maynard Hershon, a columnist for VeloNews Magazine, wrote about a new system for traveling bikes. The frame doesn't fold or collapse -- it comes apart. I was intrigued, but as my traveling phase was coming to a temporary end, I shelved the project in the nether reaches of my mind and went on to other things -- like paying the bills.
However, when negotiating the acquisition of a spiffy new titanium flyer this spring, I started thinking about the disposition of my old warhorse, a vintage 3 Rensho my good buddy Bobby Schofield had long ago christened the "Japanese Cinelli." Reasoning that it would be cruel and unusual to consign such an elegant example of cycling art to the scrap heap, I resolved to transform the 3 Rensho into the ultimate traveling bike, truly one for the road.
Think Once, Cut Twice
The quest started with thumbing through stacks of old VeloNews issues until I located the original Hershon columns. That led me to California-based S & S Machines, whose Steve Smilanick had developed the process, which involves two cuts to the frame. The cuts are made on the top tube and down tube, about an inch from the seat tube. After the cuts are made, the frame builder installs the stainless steel S & S Bicycle Torque Coupling System. These beautifully-polished connectors literally let you pull your frame apart and put it back together with precision and confidence ... in a matter of seconds.

While S & S Machines developed the technology and continues to make improvements, they don't do the actual work on the bikes. Steve suggested I check out his site at www.sandsmachine.com and locate a frame builder in my area who could handle the retrofit. When I mentioned I lived in Miami, he further suggested I contact Bilenky Cycle Works in Philadelphia, since there are no authorized S & S builders in South Florida.
First, though, I checked out the website, which is incredibly comprehensive. There's no flash there, just useful information from top to bottom. There are photos of the couplings, photos of bikes of all varieties -- including tandems -- being packed for travel, explanations of the technology and links to the sites of every authorized builder on the Planet. This is why they built the web -- total information you can use.
Linking to the Bilenky site, I knew Smilanick had steered me right. The photo of the Bilenky crew looked like a backstage picture of ZZ Top roadies. Bearded and overalled, these were clearly old school traditionalists, the kind of guys who would revere my precious 3 Rensho.
My initial conversation with Steve Bilenky confirmed my intuition, with a further bonus. Turns out the 3 Rensho was an ideal candidate for retrofit: cromoly steel, standard size tubing, nothing ovalized or oddly shaped. No problem.
While Bilenky can handle everything from designing a custom frame, building and painting it to a simple retrofit and touch up painting, I didn't even need them to do the touch up. Since my Hamilton Graphics polka dot paint job was in need of restoration, I had already contracted with Miami master painter (and mondo masters BMXer) Gary Cole to strip all the paint so that I could present the Bilenky boys with a clean working surface.
A Minor Snag
The initial tear down of the bike and the subsequent stripping did reveal a small problem. Years of sweat had led to some perforations in the top tube. It would have to be replaced. Good thing I chose Bilenky. Not only could they easily handle the job, but one of their craftsmen was so taken by the original lug work on the frame that he went overboard to try and match it when he installed the new top tube.
While Bilenky cautions that you should allow up to six weeks for a retrofit, my frame was back in the clutches of Gary Cole in about ten days. The meticulous Mr. Cole set about to improve the paint scheme -- white base, red bands, blue dots, and pearl finish. He did a beautiful job, putting me back in the shop of John Dacey at Business Cycles with just days to spare before a planned trip to California to test the reinvented bike.
Road Strategy
While the project was nearing its end, the strategy was just beginning. On the cusp of having a truly portable bike, I wanted one that would be just as useful in the mountains as it would be in Miami ... and one that would be easy for an impaired mechanic such as myself to assemble and disassemble. In addition to having the torque couplings installed on the frame, I had made two additional purchases, a hard-sided travel case and three cable couplings.
The travel case measures 26" x 26" x 10", guaranteed to be checked in by any airline as regular baggage with no extra charges. It's got rolling wheels, an extended metal handle, locks -- and not much else. It's all open space, just big enough for a patient person to fill with one bicycle, including wheels.
Just as useful are the cable couplings, one for the rear brakes and two for the gears. While they're not absolutely necessary, they make the process of packing and unpacking the bike so much easier, you'll definitely want them.
As John Dacey and I worked out the end game strategy for rebuilding this bike, we made a couple of key decisions. First, and most important, we decided to go with a triple chain ring up front. Using a 30-42-52 combination along with a nine-speed Ultegra cassette on the back wheel meant I would have 27 gears to choose from, enough for a decent sprint or a steep mountain pass. Also, to keep the mechanics of the thing simple, we opted to stay with friction shifting instead of using STI click shifting. I want anybody, anywhere to be able to fix this thing should it break down and the friction shifting should prove more forgiving over the long run.
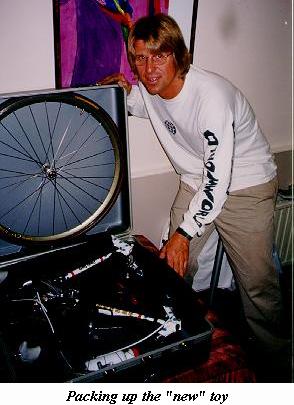
Packing It Up
So, after John figured out the optimum location for the cable couplings and screwed everything on, we were suddenly looking at a finished bike -- and a box in which we had to fit it. For this initial trip, we were using conventional 32 spoke wheels, but I'll tell you right now Spinergys are the way to go for optimal packing ease.
While no two bikes pack exactly alike (and indeed my experience would show you don't even pack the same bike exactly alike every time) the process starts by putting the rear wheel in the bottom of the case with the tire on, but deflated. Then the rear half of the frame goes in more or less simultaneously with the handlebars, which hook around the rear wheel. It should be mentioned that the exposed frame is protected with pipe insulation, about ten bucks worth at a plumbing supply store.
Next, the front half of the frame is put into place and the nooks and crannies are filled with the saddle, tool kit, water bottles and other little knicks and knacks. Then, then main components are strapped together with some Velcro straps to minimize shifting, banging and scraping. At this point, you cannot believe another wheel will fit in the case, but you fit the front wheel in the top half of the case and then gingerly close the whole thing. Mr. Dacey and I were stunned when it closed on the second try. We quickly turned the locks and I was out the door, excited with my new/old possession and terrified I would never be able to put it together again.
First Road Test
Days later I found myself at the north San Diego County compound of noted former Florida tri-geek Chip Martoccia. After a morning surf, we decided a ride was in order. It should be noted that Chip also is a former bike storeowner, so he is a little more qualified than I to put the bike together. Though he had never heard of the torque coupling system, he pulled the bike out of the case, figured it out and assembled it ready-to-ride in seven minutes. No kidding, I timed it myself.
Chip was psyched. "Everybody's gonna want one of these. Even if you don't cut your frame, you should get these cable couplers. They're perfect for triathletes who want to change from road bars to a time trial set up," he enthused.
While our first ride was short and easy, the next day we did a 40-miler. On a long section between descents, I noticed an odd sensation with the frame, which had otherwise felt 100% perfect. I thought it best to get off the bike and check. Good thought. The torque coupler on the top tube, the only thing I had been responsible for, was coming loose. I had been afraid of overtightening it and stripping the threads, a mistake I won't make again. Fortunately, I had the torque wrench in my saddlebag and in seconds we were back riding again.
After the ride, we quickly packed the bike back in the case for its next test. Jim Woodman, Florida Sports' publisher, was in Dana Point waiting to head to Lake Tahoe for his honeymoon. On my way to LAX, I stopped off in Dana Point, handed him the case and the key and wished him good luck.
Worked for him, too. Never having seen the retrofitted bike, he sorted it all out and had some good rides over the course of the next week. He did experience one severe case of high-speed wobbles on a long fast mountain descent, but checked the torque couplings and found them to be perfectly tight. Fortunately, we haven't had any steep mountains lately to duplicate the experience and figure out what caused the problem.
Last Test -- Bicycle Heaven
So far, we had put the bike to two good tests, but I had managed to avoid personally assembling it. Chip and Jim are both my mechanical (and athletic) superiors) so it was with some trepidation that I checked it in for the long flight to a bicycle heaven -- The Netherlands.

My room in Amsterdam reminded me of the bunks in the German submarine war movie Das Boot. There wasn't a lot of room to begin with and my gear filled all the available space. Still, my biggest problem putting the bike together had to do with hanging the rear derailleur properly, not in dealing with all the couplings. I'll admit it probably took a little over a half hour, but I was damn proud to be rolling down the street in Amsterdam on a bike I had personally screwed together.
After an initial check out ride on Friday, I went for an epic five-hour tour on Saturday, seeing parts of Holland I had never seen in several previous trips. It truly is a heaven for cyclists. Everybody rides, and there are miles and miles of roadways dedicated to the exclusive use of cyclists, with excellent signage to point you in the right direction.
After going across open fields, riding along canals, passing countless windmills, I found myself at the beach at a town called Zandvoort. Who knew? Nobody from America goes to Amsterdam and winds up at the beach, but because I had a bike, I did. Even better, at the south end of town, I found the entrance to the bikeway that heads south through the dunes and along the beach. We're not talking a five or ten mile bike path, but a full service bike highway that goes the length of the country down to France and continues on even further. Make a left about halfway and you can cruise over to Germany.
To call it "great" would be severe understatement. This was a busy road. Lots and lots of families on bikes, some serious trainers, a few inline skaters, a handful of runners and walkers -- and not a car in sight. Incredible. This one ride alone was worth all the effort I had put into this project, but the dividends will keep coming for years.
What's It All Cost?
Like anything else, options you choose can drive the price of your retrofit pretty high, but entry level ain't bad at all. Bilenky will install the S & S Torque Couplers and do touch-up painting for about $350. The hard case I purchased from them is another $350, but for maximum flexibility there is a soft-sided backpack option for considerably less. By the time I paid Gary Cole an incredibly modest sum for the paint job and reimbursed John Dacey for the triple chain ring crank set and other little odds and ends, I was into four figures, but just barely.
And, if you're in the mood for an all-new bike that happens to travel well, Bilenky is just one of many vendors who will build your traveling bike from the ground up at very reasonable prices. The S & S Machines website gives you dozens of options.
Running vs. Biking
While I'm very happy with my traveling bike, I'm still not sure it replaces running as the ultimate sport for travelers. In general, I think you need to be in one city for at least three full days to make it worth carting your bike along for the ride(s). I love riding through New York's Central Park or along California's beaches, but a lot of times it's much easier to simply lace up the shoes and pound the pavement.
At the same time, I know that I'll get a lot of use out of my ultimate road bike and enjoy rides I once only dreamed I could take. That's me, and for me it's definitely worth it. You have to make your own call, but I will point out one last thing. Even if you're not a business traveler, but you fly to race bikes or triathlons, then it's a no-brainer. You have to get your bike ready to fly.
Contact:
S & S Machine -- Steve Smilanick
(916) 771-0235
www.sandsmachine.com
Bilenky Cycle Works -- Steve Bilenky
(215) 329-5064
John Dacey -- Business Cycles
(305) 273-4440
www.businesscycles.com/spokewrench
©1999 Active Sports USA, Inc. - All Rights Reserved.