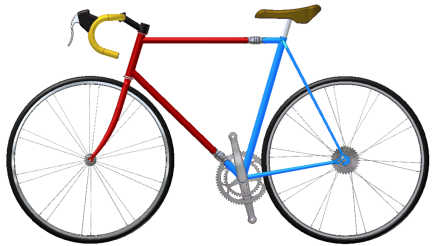
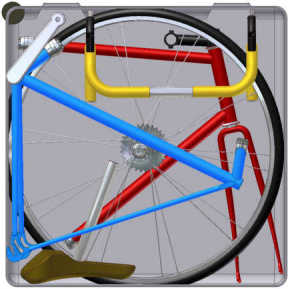
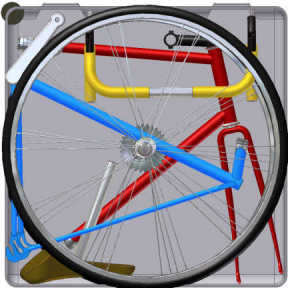
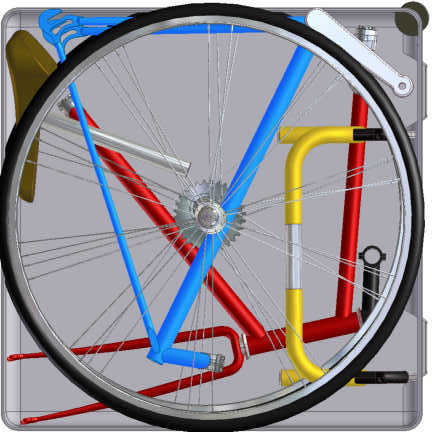
The bicycle is painted red and blue to make it easier to identify the pieces in our illustrations.
Packing sequence for and S and S Coupled road bicycle
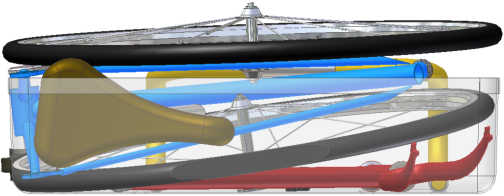
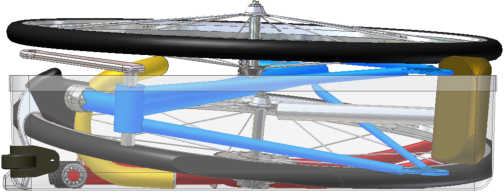
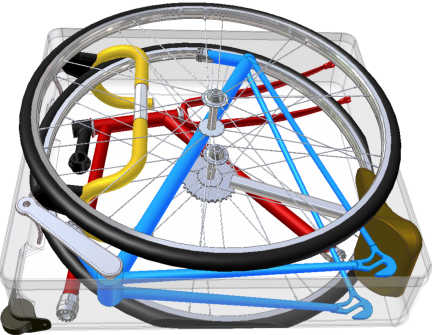
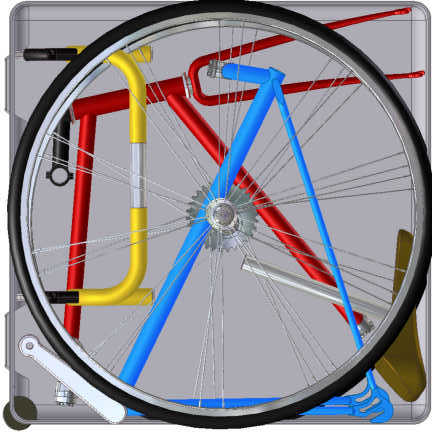
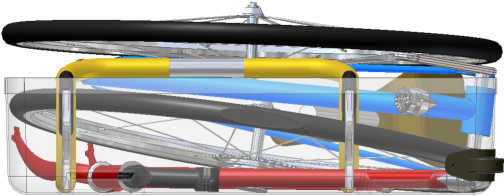
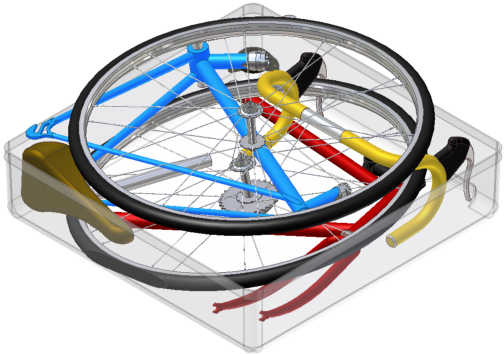
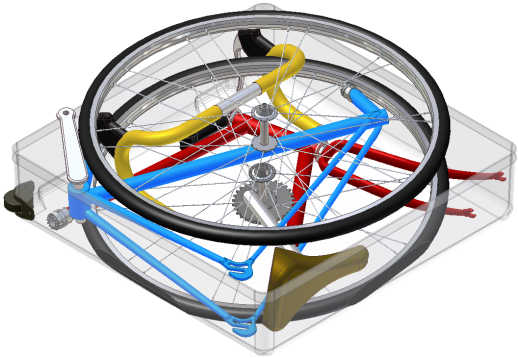
The bike shown here has many small items left off to make it easier to draw but that doesn't change the packing method. This is our most popular method of packing but it is by no means the only way to pack an S and S Coupled bike. When using this method, it may be necessary to slightly reposition some items to make your bike fit. Variations are required because as size and geometry of a bike changes, the position of items in the case changes too. In some of the drawings, the case is shown as being transparent to make all the pieces visible. Caution, the tube covers and compression members are not shown in this drawing but should be used to protect your bike while it's in the case. For more tips on packing a bike, see the packing sequence for a 63cm Merlin road bike.
The bicycle is painted red and blue to make it easier to identify the pieces
in our illustrations.
| For the illustrations on this page, we refer to the side of the case with
the lid, hinge and feet as the top side. The person packing a case is
typically positioned along the bottom side so the lid
isn't in the way. The word bottom by
itself refers to the lowest point in the lower half of the case. The lid
was removed from these illustrations for clarity.
Use the View Selector to view the packed bicycle from different angles. Although we rotate the case so it can be seen from many different vantage points, the top side, right side, bottom side and left side labels will always be relative to the case feet as shown in this image. |
|
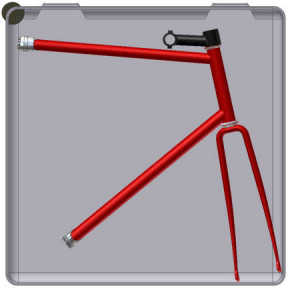
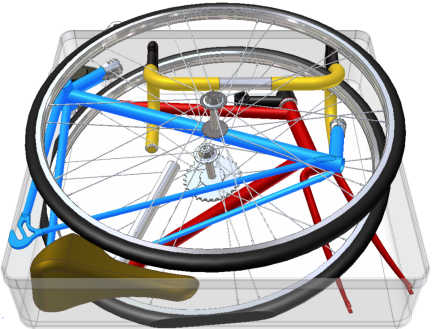
Step 1.
Pack the front triangle, turn the stem if necessary.
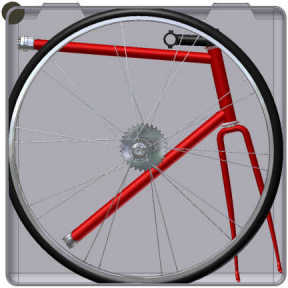
Step 2.
Pack the rear wheel cogs down.
The wheel touches the
bottom of the case on the left side.
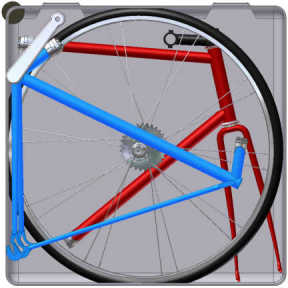
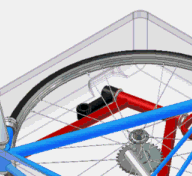
Step 3.
Pack the rear triangle.
Step 4.
Pack the handlebars and seat.
Click here for an animation of the bars going into
the case. 55K
Step 5.
Pack the front wheel.
View Selector:
Click on an arrow to see
additional views.
Imagine yourself standing on an arrow looking in that direction.
|
|
|||
 |
|||
|
|
|
Viewed from the bottom side
3 Images Scroll Down
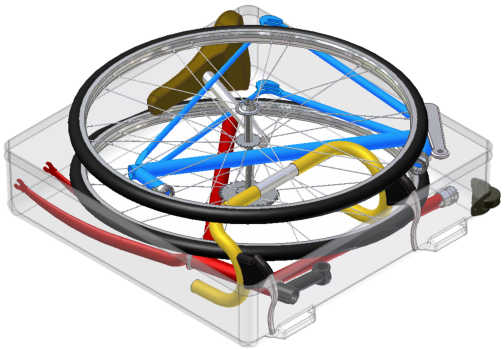
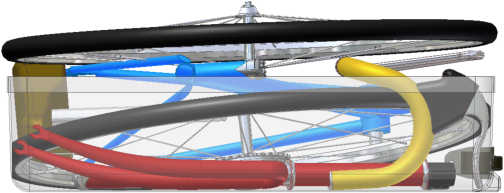
Side view from the bottom side
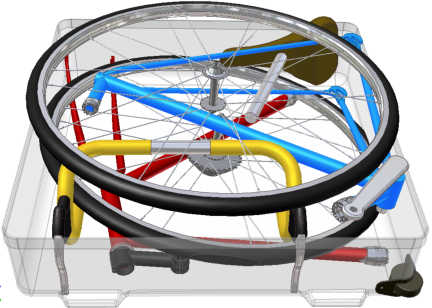
Angle view from the bottom side

Plan view from the bottom side
Viewed from
the bottom left corner
![]() Return
to View Selector
Return
to View Selector
Viewed from the left side
3 Images
Scroll Down
Side view from the left side
Angle view from the left side
Plan view from the left side
Viewed from the
top left corner
![]() Return
to View Selector
Return
to View Selector

Viewed from the top side
3 Images
Scroll Down
Side view from the top side
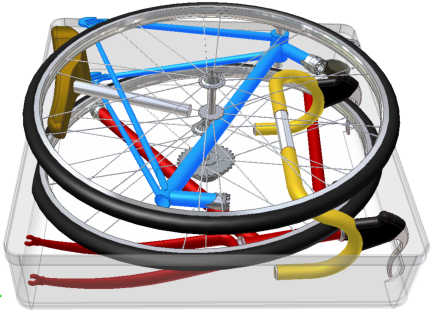
Angle view from the top side

Plan view from top side
Viewed from the
top right corner
![]() Return
to View Selector
Return
to View Selector
Viewed from the right side
3 Images
Scroll Down
Side view from the right side
Angle view from the right side
Plan view from the right side
Viewed from
the bottom right corner
![]() Return
to View Selector
Return
to View Selector
For additional instructions and photos of an actual bike being packed, click here.
Framebuilder list | Cases | Packing | Photos | Reviews | Comments | Retailer list | Installation | Specifications | Cost | Retrofit or new? | Travel adventures
